After my great experience after GopherCon last year, I wanted to show Yuko around Boulder a bit. Benny was going back to GopherCon, so the two couples scheduled an extended weekend for sightseeing.

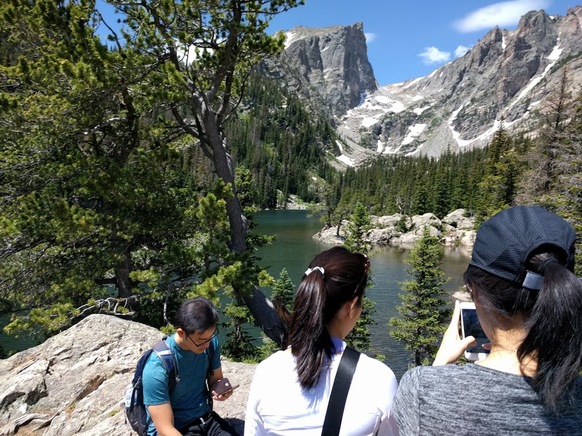
Emerald Lake, Rocky Mountain National Park.
Day 1
Yuko and I were meeting some friends at the airport who took a later flight, so we spent some time in Denver.
City O’ City: A great vegetarian/vegan place. The menu is huge and the food is great. I had an El Jefe bean burger that did not disappoint.
Union Square Train Station: It’s actually worth a walk around the train station if you’re in the area. The renovated, reinvigorated space reminds us of how travel used to be, and could still be, given a little better planning. The ice cream at Milkbox Ice Creamery looked and smelled great, but we did not partake, and I’m a fan of The Kitchen line of restaurants, which has its Next Door outpost here.
Wynkoop Brewing: It was hot and very sunny by the time we exited the train station, so our next move was motivated by air conditioning and beer. Wynkoop Brewing is across the street from the train station and serves up some good craft beer.
Tattered Cover Bookstore: A short hop from the brewery (…see the pattern?), this bookstore is one of the largest independent bookstores left in the U.S.
Jagged Mountain Craft Brewery: More good craft beer. The Cattywampus and the Sawach IPAs are definitely worth having, though their tap list rotates. They had a beer-infused creamsicle which, while not super beer-y, was still delicious.
The Kitchen Denver: This is my second time here in two trips. The food and service are lovely. We had a quick meal at the bar.
Voodoo Doughnuts: An iconic Portland doughnut shop, the selection is odd-ball and they’re famous for their maple bacon donut. I liked The Loop, which is encrusted with Fruit Loops. Pro tip: when meeting friends at the airport, it’s not a terrible idea to buy a few extra to share.
Day 2
After our complete and healthy breakfast of leftover Voodoo Doughnuts, our plan was to get a packed lunch from a market, head to Rocky Mountain National Park (RNMP) to do a hike, and then hit up a brewery. RockyMountainHikingTrails.com was a great resource in figuring out which hikes to take.
St. Vrain Market: I think we chose a place to get a packed lunch from correctly. St. Vrain is a well-stocked little market right on the way to RMNP with some good sandwich selections and homemade bread. They have a $9 special for a sandwich, chips or apple, and a cookie, packed in a bag.

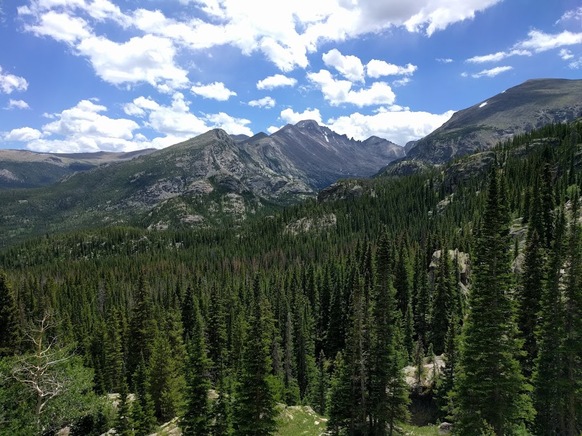
Along the hike to Emerald Lake, Rocky Mountain National Park.
Emerald Lake Hike: We hiked to Emerald Lake, which passes two other small lakes and is connected to the every popular Bear Lake. The ~3.5 mile round trip hike to Emerald Lake is well trodden, not difficult, but gorgeous. If 3.5 miles is too much, Bear Lake is very pretty on its own, and it has a short, 0.5 mile trail around it. Get here early as the parking lot fills up fast. We got there around 10am which was far too late. (But, our visit had a happy ending: a park ranger directing traffic had pity for our tiny little Prius, so she instantly made another parking spot by moving a sign. Thank you for making our day!)
Old Fall River Road: Definitely drive up this scenic, long, one-way, gravel road. Pull off to take pictures and throw a snowball or two. The only designated attraction on the road is Chasm Falls, which is a pretty waterfall with a short-but-steep path leading to a good vantage point. There are lots of other opportunities to stop and enjoy the scenery along the road. The marmots are plentiful and super-cute.
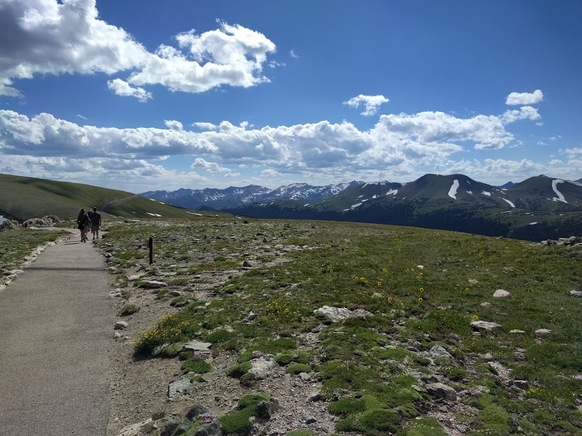
Alpine Visitor Center: The road ends at the Alpine Visitor Center, which is worth getting out and walking around. There is a short path from the visitor center to the nearby summit, which has great views and often has herds of elk chilling out on the tundra. The drive down from the visitor center is also beautiful and provides many opportunities to stop at scenic overlooks.
Avery Brewing: This is my second visit in two trips to this brewery and I really like it. The beer is phenomenal, the food is good, and the outdoor patio is host to so many cute dogs. The Chai High, the Tweak, and the Dionisian Series at the time were my favorite. Get anything aligned with your beer interest that is a “Tap Room Rarity” and stay for a while.
Day 3
Our plan for this day was to get breakfast, go for another hike, visit the cute, hippy mountain town of Nederland, and then visit some more breweries. But, We decided to cut down on the driving time by not going back to RMNP, which I actually regretted. The hike we ended up on was nice, but I loved the mountain environment and the dense, cool alpine air. It was fortunate that we chose to visit Nederland when we did, as the next day, a very large wildfire consumed some of the area we drove through.
Santiago’s: Benny and I visited a Denver outpost during our last trip and had delicious breakfast burritos. An order of two “Half & Half” burritos, each of which are not huge, is the thing to get and is sufficient for me, though three could have been great. Unlike in Denver, there is no seating here, so we brought
1st/2nd Flatiron Hike in Chautauqua Park: This is the signature hike that starts right in town, up to near the summit of the iconic Flatirons that are emblematic of Boulder. The main trail consists of many switchbacks (shortcuts exist, but have caused severe erosion) and one scramble. The views of town on one side and of the rest of the Front Range are nice, but I think the scenery in RMNP is better.
Sundance Cafe: After our hike, we got into the car and headed to Nederland, which has been described as a hippy mountain commune. They serve good diner-style food in large portions, plus some local craft beer, which is a perfect combination after a couple of hours of hiking. The view from their porch was very nice, but we opted to sit inside out of the sun.
Blue Owl Books: The bookstore is nice, but the homemade ice cream is better. Ask for suggestions and taste a few flavors before making a decision. Sit outside on the benches and revel in the beautiful weather. When we went, the server was a young man who had just graduated high school and was on his way to NYU, starting yesterday (at the time of writing); I hope all is well with him in his newfound city!
Harvest House: I’d never been to a dispensary before (and had never consumed any Schedule 1 narcotics!), but we figured we’d see what it was like. This was a very pleasant, professional establishment with a very attendant, knowledgeable salesperson. This was all validated by the customer ahead of us, who exemplified exactly the friendly stoner stereotype. If this is a good example of the kinds of business created by the “green rush”, then the world will be a happier place.
Happy Trails Cafe: Good coffee, good service, cute interior. ‘Nuff said.
Drive back to Boulder via Peak to Peak and Ward: I chose to drive us back a different way back to show my companions the views and houses scattered over the mountains behind Boulder. We drove on the famous Peak to Peak Highway, through Ward, down Lefthand and Lee Hill, and back to town. This is recommended. However, Google Maps may route you incorrectly into Ward: we traversed some roads that really are meant for a 4WD vehicle and turned some heads of locals with our tiny Prius.
University Cycles: I was very happy with my encounter with University Cycles on my last trip, and my second encounter validated my feelings. Benny and I were well attended and well supplied for the next day’s ride. I’ll continue to visit University whenever I’m in town.
FATE Brewing: FATE has a large menu of both beer and food, and has ample outdoor seating, so we went for dinner. It was nice, but it was so large that I felt it was impersonal and industrial.
Upslope Brewing: The night was young, so we hit up Upslope to visit another local brewery. The selection of beer I had was okay, and they were distinctly not busy. We played a boardgame from their ample supply.
Day 4
The plan for the day was for me and Benny to get up early for a bike ride in the hills and to meet up with our wives after.

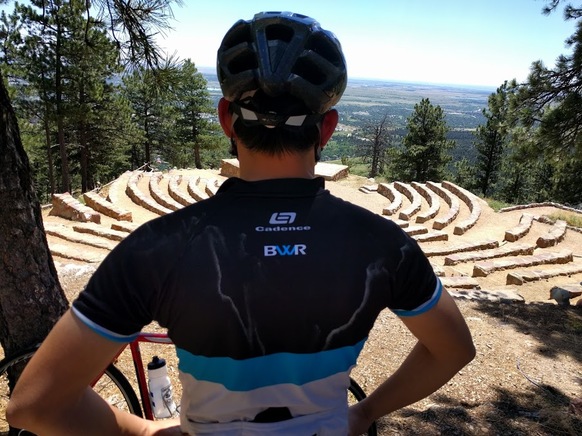
Near the end of a hot ride at Sunrise Ampitheater, near the Flagstaff summit.
The Cup Espresso: Open early, we got a bagel breakfast sandwich and an espresso before heading out, just as I did last year.
Cycling: Gold Hill and Flagstaff: Not wanting to abandon our wives for an entire day, we rode one of the same short routes as I did last year. This time, I hadn’t been riding my bike leading up to this trip and I was significantly more out of shape. Still, this is a great route; see my description from last year. Reaching the town of Gold Hill, we were dismayed to see the namesake general store closed, which was our planned mid-ride refueling stop. We instead picked up some water at Chautauqua Park before heading up Flagstaff.
Lolita’s Deli: Upon returning our bikes to University after our ride, we asked the staff for a good nearby place to have a quick lunch. This hit the spot: a ginormous sandwich with chips and a pickle, and all of the liquids one could want.
West Flanders Brewing: We met up with our wives at this centrally-located brewery. I went here last year and it again is worth visiting for a pint if you have the time while on Pearl.
Walking around Pearl Street: We browsed in a bunch of stores and watched some of the street performers. The locals have been complaining that Pearl Street has gotten too focused on large brands and I can see why. Still, it’s a very nice pedestrian mall that really sets the bar for urban planning.
Frasca Food & Wine: We had made a late reservation for the best restaurant in town. It reminded us of fancy restaurants in New York. The food was good, but I’m jaded by home. The service was too overbearing at times; sometimes we just wanted to be left alone and we really didn’t need the menu read to us. Still, I recommend going if you have the funds and you particularly like fine Italian cuisine paired with a really good wine list.
Day 5
We had an early flight back to New York. Reflecting on our trip, Yuko and I both agreed that we could live in Boulder, though the lack of diversity and Asian markets were significant downsides.
Zeal: We had a very quick breakfast here before departing for the airport. The service was good and the food was fine. For the same reason I don’t go to church, I’m suspect of any place that heavily advertises an ideology of $180 3-day juice cleanses being good for your health, though.

A view from the summit near Alpine Visitor Center.